Incubating fertile eggs at home is the process of providing precise temperature, controlled humidity, and regular turning to hatch healthy chicks in a controlled environment. Chicken eggs take around 21 days to hatch, with days 1–18 as the active phase and days 19–21 as lockdown. You do not need a commercial hatchery to do this well. With the right incubator, a reliable thermometer and hygrometer, and a clear daily routine, families and homesteaders can hatch strong, healthy chicks at home. This guide walks you through every step, from equipment selection to post-hatch chick care.
What equipment do you need to incubate fertile eggs at home?
The right equipment makes or breaks your hatch. Before you place a single egg, you need a reliable incubator, accurate sensors, and a few key supplies.
Choosing the right incubator
Two main incubator types exist for home use: forced-air and still-air. Forced-air incubators use a fan to circulate warm air evenly throughout the unit. Still-air incubators have no fan, which creates temperature gradients inside the cabinet. Your choice affects how you read and manage temperature throughout the incubation period.

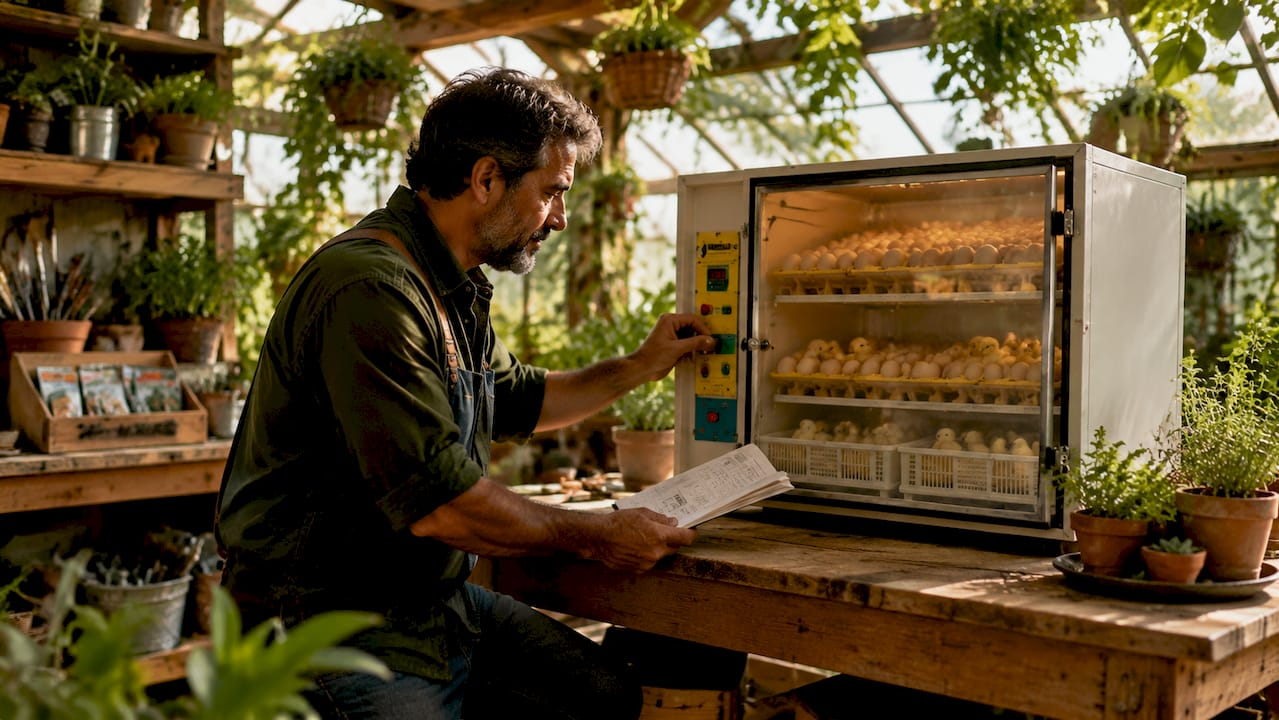
Most beginners do well with a forced-air digital incubator. Units like the Surehatch Auto Digital Egg Incubator automate turning and display temperature and humidity readings in real time. That removes two of the most common sources of human error.
Essential supplies checklist
- Incubator (forced-air or still-air, with digital controls preferred)
- Thermometer and hygrometer (calibrated and placed at egg level)
- Egg trays with turning mechanism (manual or automatic)
- Candling light (a small, bright flashlight or dedicated egg candler works well)
- Water trays or channels inside the incubator for humidity control
- Notebook or app to log daily temperature, humidity, and turning records
Pro Tip: Calibrate your thermometer and hygrometer before loading any eggs. Placing sensors at egg level, not at the top of the cabinet, gives you the most accurate readings and prevents chasing incorrect data during incubation.
| Supply | Purpose |
|---|---|
| Forced-air incubator | Maintains even temperature throughout the cabinet |
| Calibrated hygrometer | Tracks humidity to prevent membrane drying or excess moisture |
| Automatic egg turner | Turns eggs consistently without manual intervention |
| Candling light | Monitors embryo development without cracking eggs open |
| Water tray | Raises or lowers humidity as needed during each phase |
Set up your incubator in a room with stable ambient temperature, away from direct sunlight, drafts, and heating or cooling vents. Temperature swings in the room translate directly into instability inside the unit.

How should you select, store, and prepare fertile eggs?
Egg quality before incubation sets the ceiling on your hatch rate. No incubator can fix a poorly stored or damaged egg.
Sourcing fertile eggs
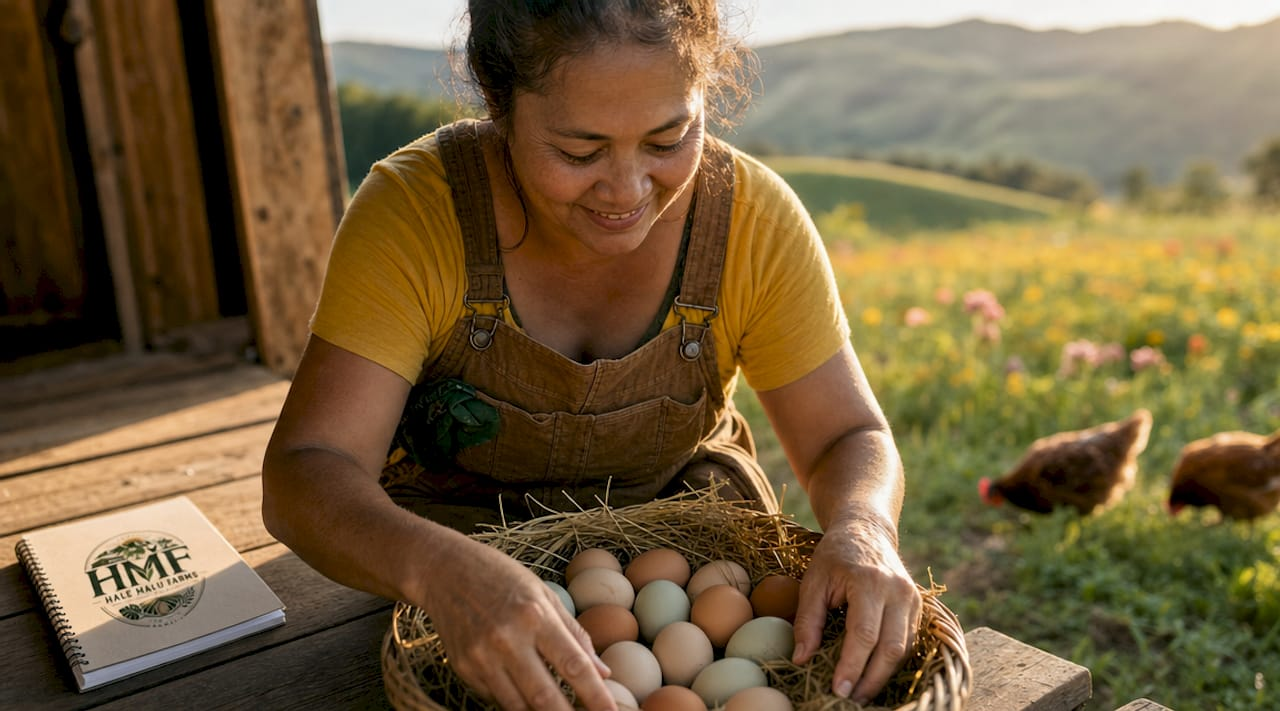
Fertile eggs come from hens that have mated with a rooster. Grocery store eggs are not fertile and will not hatch. Your best sources are:
- Your own flock with an active rooster
- Local heritage breed breeders
- Online hatcheries that ship hatching eggs with proper packaging
When buying from a breeder or hatchery, ask about the rooster-to-hen ratio and how recently the eggs were collected. Freshness matters more than breed.
Storing eggs before incubation
Fertile eggs store best at 50–60°F with moderate humidity, pointed end down. If you store eggs for more than three days before setting them, turn them gently once daily to prevent the yolk from settling against the shell membrane. The maximum recommended storage window is seven days. Beyond that, hatch rates drop noticeably.
- Do not refrigerate fertile eggs. Cold temperatures below 40°F damage embryo viability.
- Keep eggs away from direct light and strong odors.
- Handle eggs gently. Hairline cracks you cannot see will allow bacteria inside.
- Let eggs warm gradually to room temperature for 6–12 hours before placing them in the incubator.
Pro Tip: Mark each egg lightly with a pencil on both sides before setting. An “X” on one side and an “O” on the other makes it easy to confirm every egg gets turned fully during manual rotation.
Warming eggs to room temperature before placement prevents condensation from forming on the shell inside the incubator. Condensation introduces bacteria and can block the tiny pores the embryo uses to breathe.
Step-by-step incubation: temperature, humidity, turning, and candling
This is the core of the process. Consistency here determines your hatch rate more than any other factor.
Setting up and stabilizing your incubator
Run your incubator empty for 24–48 hours before loading eggs. This lets you confirm that temperature and humidity hold steady at your target levels. Do not skip this step. An incubator that drifts by even a degree or two during the first 24 hours will cause problems later.
Temperature targets by incubator type
Forced-air incubators target 99.5°F measured at egg level. Still-air incubators require a higher reading of 101–102°F measured at the top of the eggs. The difference exists because still-air units have a temperature gradient from top to bottom. Knowing your incubator type is the first step to hitting the right number.
Humidity targets by phase
Humidity during days 1–18 should stay between 45–55%. During lockdown on days 19–21, raise humidity to 65–75%. Higher humidity at lockdown prevents the membrane inside the shell from drying out and trapping the chick.
| Phase | Days | Temperature | Humidity |
|---|---|---|---|
| Active incubation | 1–18 | 99.5°F (forced-air) / 101–102°F (still-air) | 45–55% |
| Lockdown | 19–21 | Same as active phase | 65–75% |
Turning, candling, and daily management
- Turn eggs at least three times daily from day 1 through day 18. Consistent turning prevents the embryo from sticking to the shell membrane. Odd numbers of turns per day mean the egg rests on a different side each night.
- Candle on day 7 to check for early embryo development. A healthy embryo shows a dark spot with visible veins spreading outward. Clear eggs are likely infertile. Remove them carefully to avoid contaminating the others.
- Candle again on day 14 to confirm continued growth. The air cell at the wide end of the egg should be growing larger.
- Candle on day 18 before lockdown. Remove any eggs that show no development or smell off.
- Stop turning at day 18. Stopping turning at lockdown allows the chick to orient its head toward the air cell, which is the correct position for pipping and hatching.
- Raise humidity and close the incubator. Do not open it again until all chicks have hatched and dried.
Pro Tip: Candling takes about 10–15 seconds per egg once you know what to look for. Use a dark room and hold the light firmly against the wide end of the egg. Your eyes are your best tool here.
Ventilation matters throughout the process. Most incubators have adjustable vents. Keep them partially open during active incubation and slightly more open during lockdown to allow fresh air exchange as chicks begin breathing inside the shell.
What should you expect during lockdown and hatch days?
Lockdown is the most hands-off phase of the entire process, and that is exactly the point.
Opening the incubator during lockdown causes rapid drops in both temperature and humidity. Those drops increase the risk of chicks dying before they fully hatch. The rule is simple: close it and leave it closed.
Here is what to watch for during hatch days:
- Pipping: The chick uses its egg tooth to break through the shell. You will see a small crack or hole appear, usually on the wide end of the egg.
- Zipping: The chick rotates inside the shell, cracking a line around the top. This can take several hours.
- Hatching: The chick pushes the cap off and emerges. Newly hatched chicks look wet and exhausted. That is normal.
Do not assist a hatching chick unless it has been stuck at the same stage for more than 24 hours and shows signs of distress. Premature help tears blood vessels and causes more harm than good.
Once chicks hatch, leave them in the incubator until they are fully dry and fluffy. This usually takes 12–24 hours. Then move them to a brooder, which is a warm, draft-free box with a heat lamp, fresh water, and chick starter feed.
Pro Tip: Set up your brooder before hatch day. A cardboard box with a 250-watt heat lamp, a thermometer, and a shallow water dish is all you need to start. Aim for 95°F at chick level during the first week.
Common mistakes and how to fix them
Most incubation failures trace back to environment, not egg quality. Incubation failures typically result from environmental instability rather than poor eggs. Fixing your environment fixes your hatch rate.
Watch for these common mistakes:
- Temperature swings: Placing the incubator near a window, vent, or door causes ambient temperature changes that destabilize the unit. Move it to an interior room.
- Skipping egg turns: Missing turns for even a full day increases the risk of the embryo adhering to the shell membrane. Use an automatic turner if your schedule is unpredictable.
- Low humidity during lockdown: Membrane drying is one of the top causes of late-stage chick death. Add warm water to the incubator’s water channels before lockdown begins.
- Opening the incubator during lockdown: Even a 30-second opening drops humidity significantly. Resist the urge.
- Storing eggs too long: Eggs stored beyond seven days before setting show reduced hatch rates. Set eggs as fresh as possible.
- Ignoring sensor calibration: A thermometer that reads 1°F high means your eggs are actually running too cool. Calibrate sensors before every hatch.
Pro Tip: Keep a simple daily log with temperature, humidity, and turning notes. If a hatch goes wrong, your log tells you exactly where the problem started. Without records, you are guessing.
Candling is a cost-effective way to catch problems early. Removing non-viable eggs on day 7 or day 14 prevents bacterial contamination from spreading to healthy eggs in the same tray.
Key Takeaways
Successfully hatching fertile eggs at home requires stable temperature, controlled humidity, consistent turning through day 18, and a closed incubator during the lockdown phase on days 19–21.
| Point | Details |
|---|---|
| Temperature precision | Forced-air incubators target 99.5°F; still-air incubators need 101–102°F at egg top. |
| Humidity by phase | Hold 45–55% during days 1–18, then raise to 65–75% for lockdown days 19–21. |
| Turning stops at day 18 | Stopping turns lets the chick orient correctly for pipping and hatching. |
| Egg storage window | Store fertile eggs at 50–60°F for no more than seven days before setting. |
| Lockdown discipline | Keep the incubator closed from day 18 onward to protect humidity and temperature. |
What I have learned from years of hatching at home
I have run hatches with basic still-air units and with fully automated digital incubators, and the honest truth is this: the equipment matters less than the habits you build around it. A $60 still-air incubator managed carefully will outperform a $300 digital unit that gets opened every day out of curiosity.
The single biggest shift in my hatch rates came when I started logging every reading. Temperature at 7 a.m., humidity at noon, a note on how many eggs I turned. That log caught a pattern I never would have noticed otherwise. My incubator ran 0.8°F cool every morning because the room cooled overnight. I adjusted the thermostat slightly and my hatch rate improved noticeably on the very next batch.
My other hard-won lesson is about egg storage. I used to set eggs as they came, sometimes mixing eggs that were one day old with eggs that were six days old. The older eggs consistently lagged or failed. Now I collect for five days, set them all together, and the hatch is far more even.
For families just getting started, I always recommend beginning with chicken eggs before moving to quail, duck, or turkey. Incubation periods vary by species: quail hatch in about 17 days, ducks in 28–35 days, and turkeys in about 28 days. Chicken eggs at 21 days give you enough time to learn the process without the longer commitment of waterfowl. Start simple, build your confidence, and scale from there.
— kai
Halemalufarms has the supplies to get you started
Halemalufarms carries everything you need to hatch your first clutch of eggs at home, from beginner-friendly incubators to egg trays and hatchery supplies built for small-scale operations.

Whether you are setting up your first incubator or expanding an existing flock, our heritage breed layer hens and hatchery equipment are selected with home farmers and families in mind. We also carry the full range of Surehatch incubators for those ready to move beyond entry-level units. Rooted in Hawaiʻi and committed to sustainable food production, Halemalufarms is here to support every step of your home hatching practice.
FAQ
How long does it take to hatch chicken eggs at home?
Chicken eggs hatch in approximately 21 days. Days 19–23 are still considered normal, so do not panic if chicks are a day or two late.
What temperature should a home egg incubator run at?
Forced-air incubators run at 99.5°F at egg level. Still-air incubators require 101–102°F measured at the top of the eggs.
Can you hatch eggs without an incubator?
A broody hen is the only reliable alternative to a mechanical incubator. Without either, maintaining the precise temperature and humidity needed for successful hatching is not practical.
When should you stop turning eggs during incubation?
Stop turning eggs on day 18. Turning stops at lockdown so the chick can align its head toward the air cell and prepare to pip through the shell.
Why won’t grocery store eggs hatch?
Grocery store eggs are not fertile. They come from hens raised without a rooster, so no embryo develops inside the egg regardless of incubation conditions.
Recommended
- Fresh Farm Eggs –
- 370 Egg Homesteader Incubator – Surehatch Auto Digital Egg Incubator – Your Local source for all things poultry
- Egg Fertility Tester (Egg Candler) for 30 Chicken Eggs – SureView – Your Local source for all things poultry
- Plastic Quail or Chukar Egg Tray for 140 Eggs – Your Local source for all things poultry
Discover more from Your Local source for all things poultry
Subscribe to get the latest posts sent to your email.